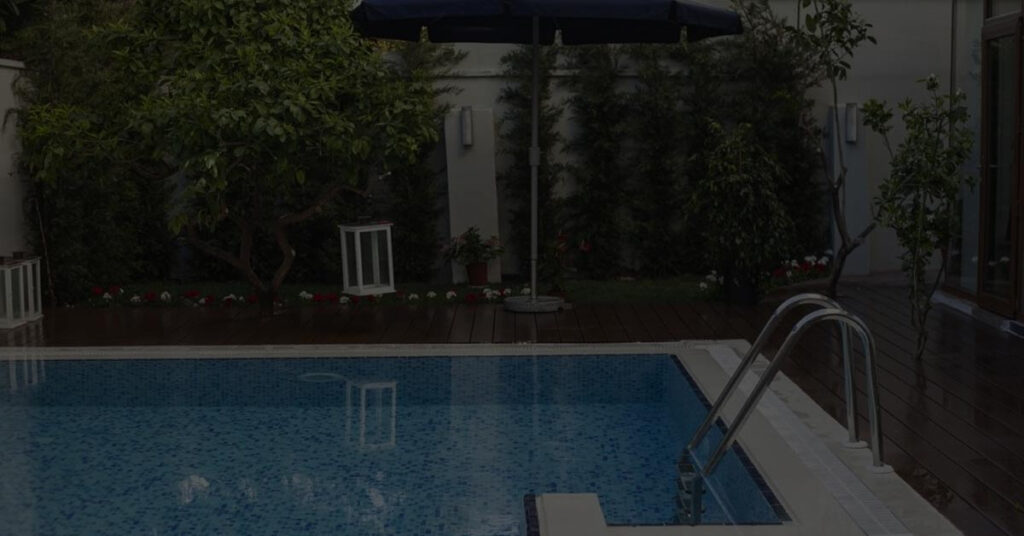
Resurfacing a pool can breathe new life into your backyard oasis, making it look and feel like new again. Over time, all pools will show signs of wear and damage, such as cracks, staining, or fading. Resurfacing your pool is essential to maintaining its appearance, functionality, and value. It’s an important task that requires understanding the type of pool you have, the materials available for resurfacing, and whether to do it yourself or hire a professional.
Not only does resurfacing enhance the visual appeal of your pool, but it also ensures that the pool’s structure remains solid and safe for you and your family. Pool resurfacing will vary in cost and complexity, depending on factors like the type of pool and the materials you choose. With proper maintenance, however, a newly resurfaced pool will last for years, offering an inviting space for relaxation and entertainment.
Key Takeaways
- A pool resurfacing project involves selecting suitable materials and evaluating whether to DIY or hire a professional.
- Proper post-resurfacing maintenance is crucial for extending the life of your pool and preserving its value.
- Draining, cleaning, and prepping the pool area for resurfacing are essential steps to ensure a successful outcome.
Understanding Pool Resurfacing
As a pool owner, I find that resurfacing a pool is an essential maintenance task that helps extend the life of the pool and keep it looking fresh and inviting. Pool resurfacing involves replacing or repairing the pool surface, which usually comprises plaster, pebble, or tile. With time, pool surfaces can become damaged due to wear and tear, exposure to chemicals, or water imbalance.
When I consider a pool resurfacing project, I take into account the type of surface material I have and the specific issues that I need to address. Some common signs that indicate it’s time for resurfacing include cracked or flaking plaster, stains or discolorations, and a rough or uneven surface. If I notice any of these signs, I know it’s time for a pool resurfacing.
There are a few different options when it comes to pool resurfacing materials. Here are the most popular materials I’ve come across:
- Plaster: A combination of cement, sand, and water, plaster is the most common and cost-effective pool surface material. It typically lasts for 5 to 15 years, depending on maintenance and water chemistry.
- Pebble: Small stones are mixed with cement for this finish, which provides a more natural and textured look. A pebble surface can last for up to 20 years.
- Tile: For a more luxurious and elegant look, tiles can be used. They are durable and can last for 25 years or more, though they’re often more expensive than other options.
Each of these materials has its pros and cons, and the choice will depend on personal preference, budget, and the overall design of the pool area.
Before starting a pool resurfacing project, I always consult with a professional. They can help me assess the condition of my pool’s surface, recommend the best method of resurfacing, and provide an accurate estimate of cost and time. Pool resurfacing is a specialized task and typically requires draining the pool completely, and it’s essential to ensure the job is done correctly to avoid any issues or damage that may lead to costly repairs.
In conclusion, understanding pool resurfacing is crucial for maintaining a safe, functional, and beautiful swimming area. Selecting the appropriate material and working with experts can make all the difference in ensuring a successful resurfacing project.
Types of Pools and Their Surfaces
Fiberglass Pools
In my experience, fiberglass pools are a popular choice due to their easy installation and low-maintenance nature. The main material used in these pools is fiberglass, which is covered with a protective layer called gelcoat. This coating helps to prevent cracks and gives the pool a smooth finish. Some high-end fiberglass pools may also feature pebble tec or pebblesheen surfaces, adding extra durability and a unique look.
Concrete Pools
Concrete pools offer more design flexibility than their fiberglass counterparts. They are constructed using concrete and reinforced steel, which allows for a variety of shapes and sizes. Concrete pools can be finished with different surfaces, such as plaster, exposed aggregate, or even a pebble tec or pebblesheen finish. These finishes not only enhance the pool’s appearance but also provide additional durability. However, concrete pools may require more upkeep than other types, as they can crack over time and may need resurfacing every 10-15 years.
Vinyl Pools
If you prefer a more budget-friendly option, vinyl pools might be the right choice for you. These pools have a vinyl liner that acts as the pool’s surface, which makes installation quick and affordable. Vinyl liners come in various patterns, allowing you to customize the look of your pool. Despite their lower upfront cost, vinyl liners may need to be replaced every 5-7 years, making them less durable compared to fiberglass or concrete pools.
In-Ground and Above-Ground Pools
In-ground pools are built directly into your backyard, while above-ground pools are installed on top of the ground. Both types of pools can be made from fiberglass, concrete, or vinyl materials, offering you a range of options to choose from. Keep in mind that in-ground pools tend to have a longer lifespan and typically add more value to your property compared to above-ground pools.
By understanding the differences between these pool types and their surfaces, you can make the best choice for your own backyard oasis. Good luck in your pool-building journey!
Resurfacing Materials and Their Features
Plaster and Concrete
When I think of traditional pool surfacing materials, plaster, and concrete come to my mind first. Plaster is a mixture of cement and sand, while concrete is a more robust combination of cement, aggregate, and water. Both materials provide a smooth finish and are commonly used for resurfacing concrete pools.
There are various options to enhance the appearance of plaster and concrete, such as adding colored plaster, quartz, or aggregate finishes like pebble, glass beads, and diamond brite. Quartz and pebble provide a more durable finish than regular plaster, while glass beads and diamond brite give a more reflective and luxurious look to the pool surface.
Tile and Stone
For a more elegant and long-lasting finish, I would consider tile and stone options. There are various types of tiles to choose from, including porcelain, glass, and natural stone. Glass tiles can create a beautiful shimmering effect, especially when sunlight hits the surface, while natural stone tiles offer a classic and timeless appearance.
Using a tile finish not only adds visual appeal but also provides an easy-to-clean and hygienic surface. The installation of tiles can be a bit more complicated compared to plaster or concrete; however, the investment can be well worth it in terms of durability and low maintenance requirements.
Epoxy and Paint
If I’m searching for a budget-friendly and quick option to refresh my pool’s appearance, epoxy and paint can be a good choice. There are different types of paint available, but epoxy paint is the most durable and resistant to chemicals, UV rays, and algae growth.
Epoxy paint creates a thick and smooth surface that can help to seal minor cracks, and it comes in various colors to suit my personal preferences. However, it’s essential to keep in mind that painting the pool might require more frequent maintenance compared to other surfacing materials, as the paint may fade or peel over time.
Draining and Cleaning a Pool for Resurfacing
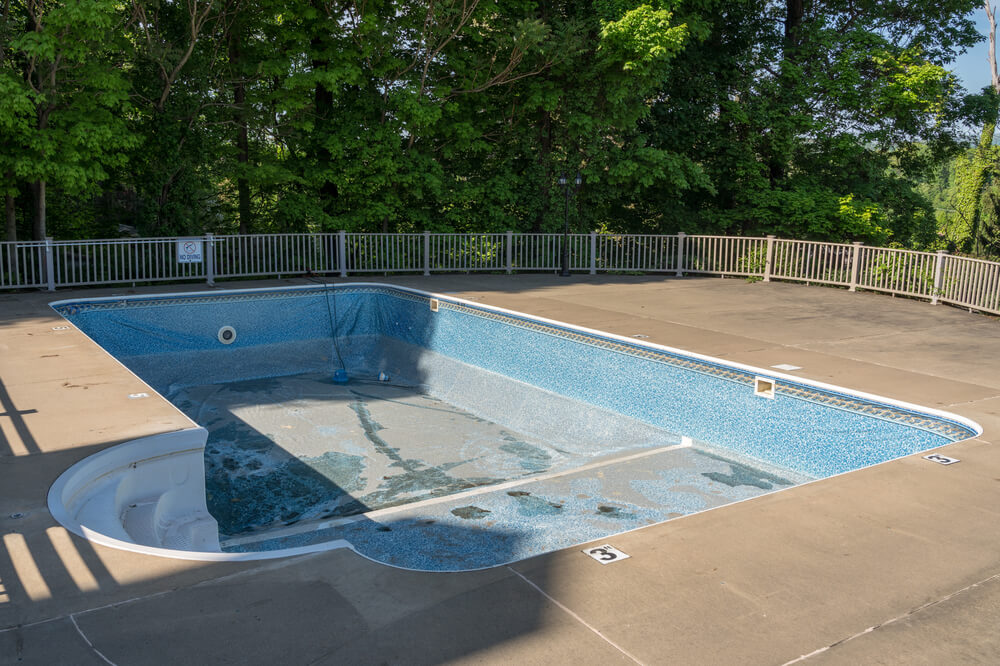
Draining the pool is the first step in resurfacing. To do this, I need to make sure the water is pumped out safely, either to a storm drain or my landscape, depending on local regulations. When draining, I should avoid discharging water directly into the streets as it can overwhelm and damage local water systems. Once the pool is empty, I can proceed to the next step.
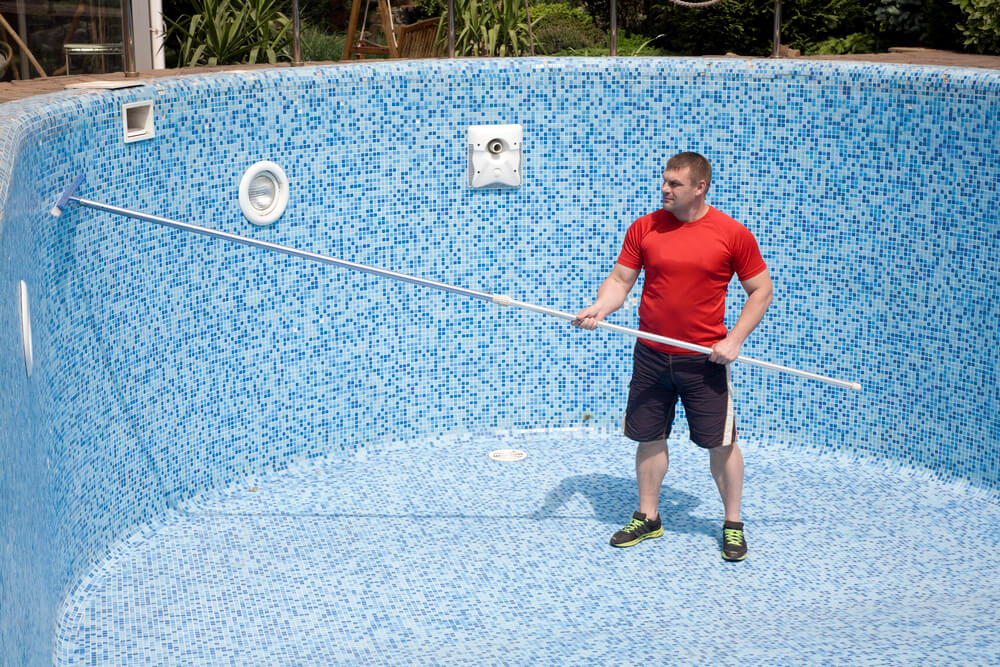
Cleaning the pool is essential to ensure a smooth and even resurfacing. I start by using a high-pressure washer to remove any loose debris, algae, or stains. This process also helps to expose the original surface, providing a better grip for the new resurfacing material. When pressure washing, I carefully work from the top of the pool towards the bottom, overlapping each pass, to prevent any missed spots.
After pressure washing, an acid wash may be necessary to remove any remaining dirt and grime, as well as to etch the pool surface, improving adhesion for the new surface material. To do this, I carefully mix and apply a diluted acid solution to the entire pool surface, taking necessary precautions such as wearing protective gear and following all safety guidelines. I then use a scrubbing brush to work the acid into the surface, followed by a thorough rinse with clean water. Once it is clean, I pump out any remaining water from the bottom of the pool.
By properly draining and cleaning the pool before resurfacing, I ensure the new surface will adhere properly, and my pool will have a fresh, clean appearance.
Common Pool Surface Problems and Repairs
As a pool owner, I know that maintaining a beautiful and functional swimming pool requires regular attention, especially when it comes to its surface. In this section, I’ll discuss common pool surface problems and their respective repairs.
One common issue that may arise is cracks. They can be small hairline cracks or larger, structural ones. Minor cracks can often be fixed with a simple patching compound, while larger cracks might require more extensive repair work, like sandblasting and pool replastering. In any case, it’s important to address cracks promptly to avoid leaks and potential damage to the pool structure.
Stains and discoloration are another concern for pool owners. There are various causes for these, such as algae growth, metal particles, or even chemical imbalances. Rust stains, in particular, can result from corroded pool fittings or the presence of iron in the water. Treatment options for stains often include using specialty chemicals and scrubbing affected areas. In some cases, it might be necessary to drain the pool and perform a stain removal treatment.
A rough surface on a pool can cause discomfort and even injury. This can result from peeling or flaking of the pool surface material, which is usually a sign that it’s time for a resurfacing job. Resurfacing often involves sandblasting the existing surface, applying a new coat of plaster or other materials, and ensuring a smooth and uniform finish. The resurfacing pool cost can vary depending on factors like the size of the pool and the chosen materials.
Finally, leaks can become a problem for any pool owner. They can occur due to cracks or damaged fittings and can lead to water loss and expensive repairs if not addressed quickly. Possible solutions include patching leaky areas, replacing damaged fittings, and in some cases, a more extensive pool repair.
By being aware of these common pool surface problems and their potential solutions, I am better equipped to maintain my pool and keep it in perfect condition for years to come.
Do-It-Yourself vs. Hiring a Professional
When it comes to resurfacing a pool, I often wonder if I should take the DIY route or hire a professional. There are pros and cons to each approach, and I’d like to share my thoughts on both.
Going the DIY route can save me some money in the short term. I have the option to shop around for the best prices on supplies and materials without the added markup that pool contractors might charge. Plus, the satisfaction of completing the project myself would make my pool feel even more like my own personal oasis. However, DIY projects may not be suitable for everyone. A swimming pool resurfacing project can be labor-intensive and might require specialized skills that I might not possess. Moreover, if I make a mistake, the consequences could be costly, time-consuming, and even dangerous.
On the other hand, hiring a resurfacing professional or a swimming pool resurfacing pro provides me with the peace of mind of knowing that the job will be done right. I can rely on the expertise of trained and licensed pool contractors who have the experience necessary to handle any unexpected challenges that might arise during the resurfacing process. Moreover, I can save valuable time by allowing the professionals to manage the project from start to finish.
Of course, the cost of hiring a professional is generally higher than doing it myself. But, to me, it’s worth considering the long-term value and potential savings. A properly resurfaced pool by a professional is more likely to last longer and require fewer repairs in the future. Plus, having a warranty on the work can provide additional reassurance.
Ultimately, whether to choose DIY or hire a professional for pool resurfacing depends on my specific needs, budget, and level of expertise. I must weigh the benefits and drawbacks of each approach and make the decision that best suits my situation.
Understanding the Cost of Pool Resurfacing
As a pool owner, I know that resurfacing a pool can be a significant investment. It’s essential to understand the cost of pool resurfacing and what factors go into determining the total price. In this section, I’ll go over some key aspects of pool resurfacing costs to help you make an informed decision.
First, let’s talk about the average cost of pool resurfacing. The price can vary widely, depending on factors such as the size of the pool, the materials used, and the location. On average, I’ve found that pool resurfacing can cost anywhere between $4,000 and $15,000.
When considering a resurfacing project, it’s important to establish a budget. This will help guide your decisions about the type of materials and scope of the project. There are various options available, with some being more budget-friendly than others. For example, using plaster for a simple resurface is typically less expensive than upgrading to a high-end material like PebbleTec.
Another aspect to keep in mind when determining the cost of pool resurfacing is labor costs. Labor tends to be a significant portion of the total price, and it can vary depending on local labor rates. A tip I’ve learned is to gather multiple quotes from local contractors to get a better understanding of the going rate in your area.
Finding ways to make pool resurfacing more budget-friendly might also be on your mind. One option is to do some of the prep work yourself, such as removing the old surface, draining the pool, or even handling some of the cleaning. However, it’s important to be cautious when doing this. If you’re not experienced, it might lead to problems that could end up increasing the project’s total cost.
In summary, understanding the cost of pool resurfacing involves considering factors such as average costs, budget, the choice of materials, and labor costs. Being well-informed about these factors will help you make the best decision and ensure your pool remains enjoyable for years to come.
Post-Resurfacing Pool Maintenance
After resurfacing my pool, I realized the importance of maintaining it in order to prolong its life and keep it looking great. I want to share some of the key aspects of post-resurfacing pool maintenance that have helped me in my experience.
One of the first things I prioritized was cleaning the pool filters regularly, as they can accumulate debris over time. I made sure to inspect and clean them at least once a month, or more if the pool was used frequently. This helped to keep the water circulating efficiently and prevented any potential damage to the equipment.
Speaking of equipment, I also made it a point to check on the pool’s various systems, such as the pumps, skimmers, and heaters. Regular inspection and maintenance ensured that everything was in good working order and helped me catch any issues before they escalated.
In addition to keeping the equipment functional, I also paid attention to the pool lights – cleaning and replacing them as needed. Proper illumination made the pool more enjoyable during evening swims and added an extra layer of safety for me and my guests.
Water treatment was another essential part of my post-resurfacing pool maintenance. I kept a close eye on the water’s chemistry, testing it weekly to make sure the pH, chlorine, and other chemical levels were balanced. Maintaining the right balance helped me prevent the growth of algae, bacteria, and other unwanted organisms in the water.
Refilling the pool was sometimes necessary after the resurfacing process; it was important to take care while doing so. I gradually refilled the pool, ensuring that the water reached all areas of the pool surface, including the steps and benches. This step was crucial to avoid any dry spots or trapped air pockets that could have compromised the integrity of the new surface.
By consistently following these friendly maintenance tips, I’ve managed to keep my pool in pristine condition after resurfacing. Remember, a little bit of effort and care can go a long way in protecting your pool and ensuring its longevity.
Prepping Your Pool Area for Resurfacing
Before I start resurfacing my pool, it’s important to prepare the area around it. This step ensures a clean and safe working environment, and it also helps the resurfacing process go smoothly.
To begin, I’ll make sure to remove all the patio furniture and any other items I have around the pool. Clearing the space allows for easier access to the pool and prevents any damage or accidents.
Next, I need to completely empty my pool using a submersible pump. This will give me a clean and empty space to inspect and work on. Draining the pool can take some time, so doing it in advance helps save time when resurfacing begins.
Before moving on to the actual resurfacing process, I’ll pay attention to the cleanup around the pool. This includes sweeping and washing the surrounding area to remove any debris that could interfere with the resurfacing later on.
By properly preparing my pool area for resurfacing, I can ensure a smooth and efficient process while maintaining a safe and clean environment to work in.
Final Words and Suggestions
When it comes to resurfacing a pool, I have a few friendly suggestions to consider. First, think about the pool material you’re working with. Different materials call for different approaches and finishing materials, so it’s essential to choose the right one that suits your pool.
When selecting a finishing material, consider the texture you would like to achieve – whether it’s polished or rough. A polished finish can give your pool a sleek, modern look, while a rough texture may offer a more classic, natural appearance. Keep in mind that the rough texture also tends to be less slippery, providing an added safety aspect.
In my experience, it’s always a good idea to consult with an expert before making any final decisions on resurfacing your pool. Professionals can guide you through the process, recommend the most suitable materials, and ensure a smooth and successful project execution. Remember to ask for advice about the best care and maintenance practices to prolong the lifespan of your revamped pool.
One last thing I’d like to mention is the importance of opting for high-quality materials and ensuring proper installation. Investing in premium products and skilled workmanship may cost more upfront, but it can save you money, time, and headaches in the long run.
I hope these suggestions help you make an informed decision and result in a beautiful, long-lasting pool resurface. Best of luck!
Frequently Asked Questions
How much does pool resurfacing cost?
As a pool owner, I understand that costs can vary depending on a variety of factors. In general, pool resurfacing can range anywhere from $3,000 to $10,000, depending on the type of material selected and the size of your pool. Ultimately, getting a few quotes from local pool professionals can help give you a more accurate estimate of the cost for your specific pool.
What are the different pool resurfacing materials available?
I’ve learned that there are several types of pool resurfacing materials to choose from. Some common options include plaster, aggregate finishes, fiberglass, and tile. Each material comes with its own set of advantages and disadvantages, so it’s crucial to research and weigh your options to find the best fit for your pool.
How long does resurfacing a pool typically take?
In my experience, the time it takes to resurface a pool varies based on the chosen material and the size of the pool. Generally, the process takes anywhere from a week to 3 weeks. Proper curing time is critical to ensure a long-lasting, quality finish, so it’s essential to allow the necessary time for the job to be done correctly.
What is the process for resurfacing a gunite pool?
As a gunite pool owner, I find the resurfacing process quite interesting. First, the pool is drained, and the old surface is removed using a method called hydroblasting or chipping. Once the surface is clean and prepped, the new material is applied. Finally, the pool is refilled and treated with appropriate chemicals to balance the water. Careful monitoring during the curing process will ensure a long-lasting, quality finish.
Which resurfacing options work best for fiberglass pools?
I’ve discovered that when it comes to fiberglass pools, there’s a specific process to follow for resurfacing. The pool is first drained, and any damaged areas are repaired. Manufacturers usually recommend applying a new gel coat, which is tailored explicitly for fiberglass pools. Once the gel coat is applied and cured, the pool can be refilled and balanced for use.
When should a pool be resurfaced?
As a pool owner, I’ve found that it’s essential to monitor the wear and tear of your pool’s surface. Signs of necessary resurfacing can include stains, discoloration, or cracking. Typically, plaster pools need resurfacing every 10-15 years, and fiberglass pools may last up to 25 years before needing a new gel coat. It’s crucial to consult with a pool professional if you notice any issues, as they can help determine the right time for resurfacing.